|
||||
|
AutoTrace a Background image
|
||||
|
||||
|
AutoTrace a Background image
|
||||
AutoTrace a Background image Pro version only
AutoTracing a raster image is always a challenging task. There isn't here a
perfect mathematical single solution for this problem.
We developed a custom feature to help you to Trace in an automatic or
semiautomatic way a Raster image.
A note: we define here as Tracing the conversion of a line/curve of black pixels in a Cad element, like a Polyline, closed Polyline, Circle, Arc, Ellipse, Spline, Closed Spline
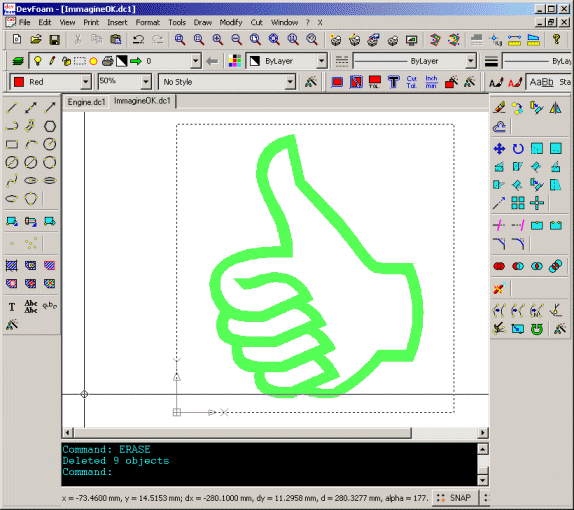
As first of course you must add a
background raster image to your Drawing. See
How to insert a background raster image.
After doing that you will see something similar to the following picture:
Now click the "Draw - AutoTrace a Background image' main menu, and this new
dialog window will appear:
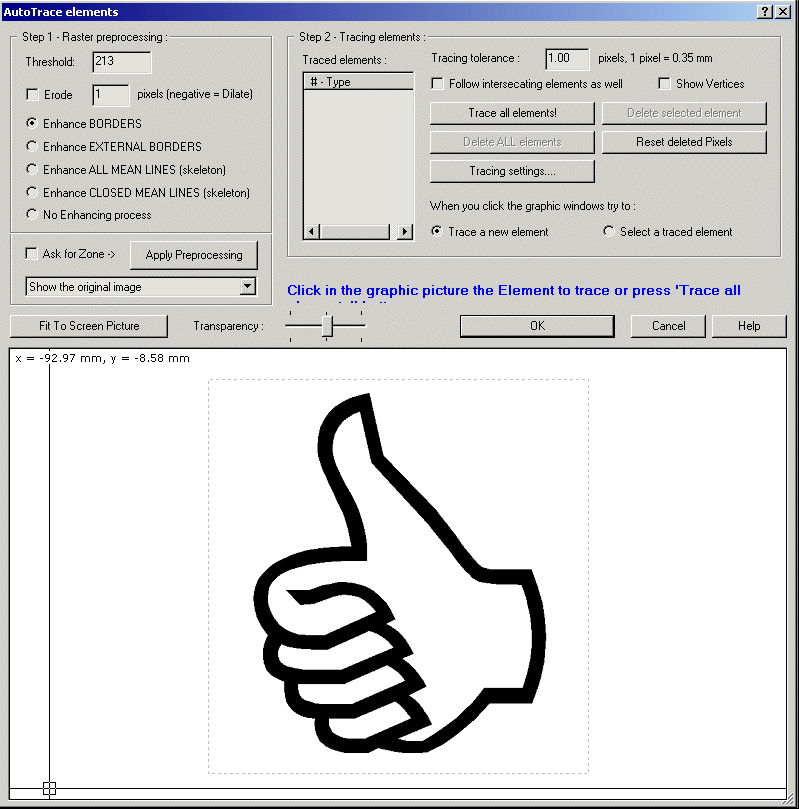
Now you must do 2 steps:
In this case we need to cut the Gray shape, so we simply will apply the 'Enhance BORDERS' function. Here below the result of this Preprocessing:
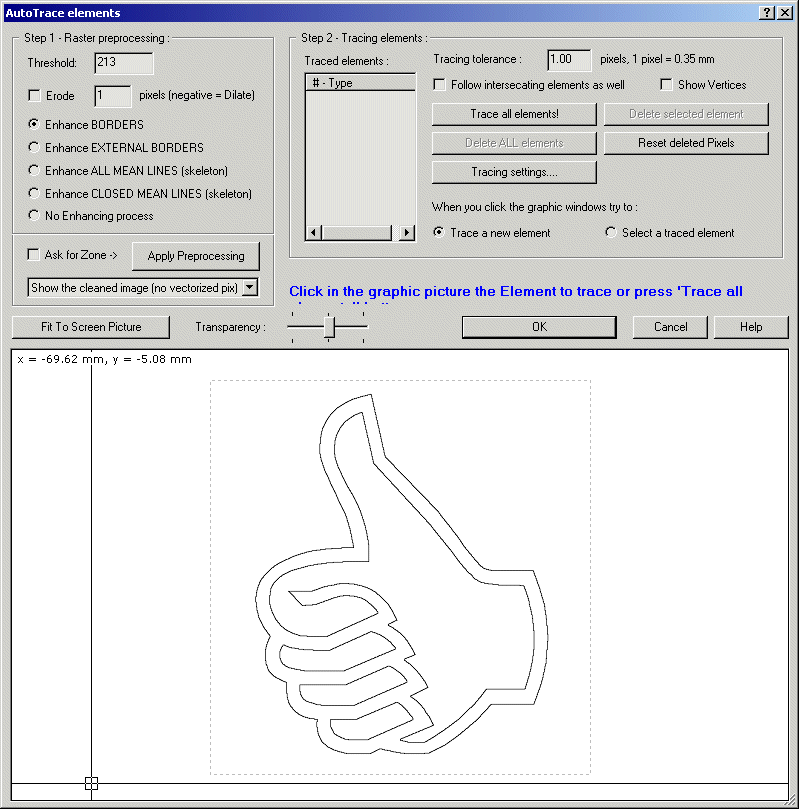
As you can see now the raster image has been modified, and just the Borders are
rendered in black. Still no traced elements, but a good starting point to get
them. The trick is to create thin '1 pixel wide' lines.
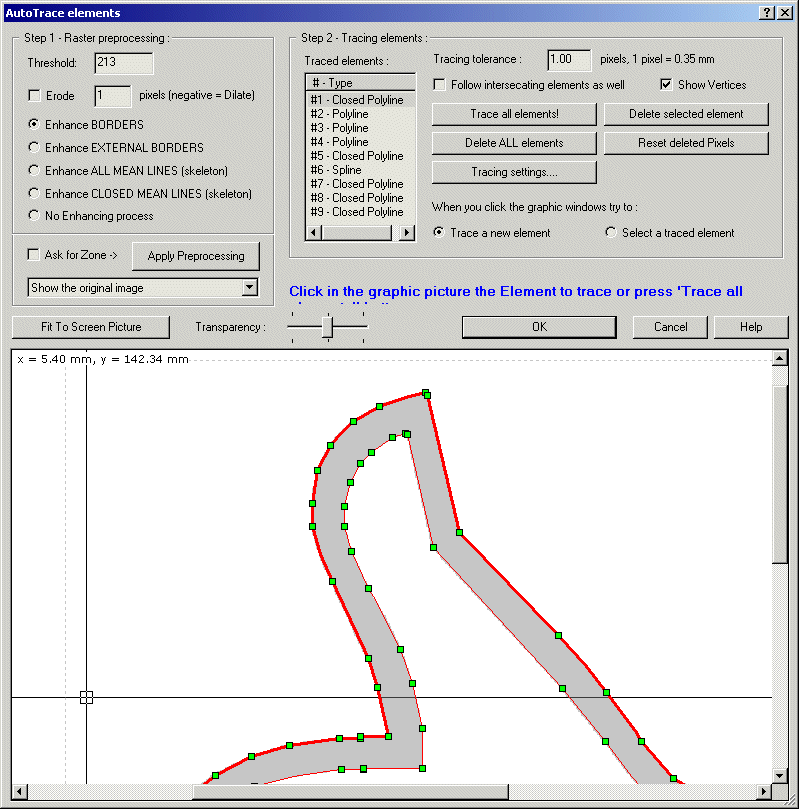
Now we can just press the 'Trace all elements!' button and the most is done,
see the picture below:
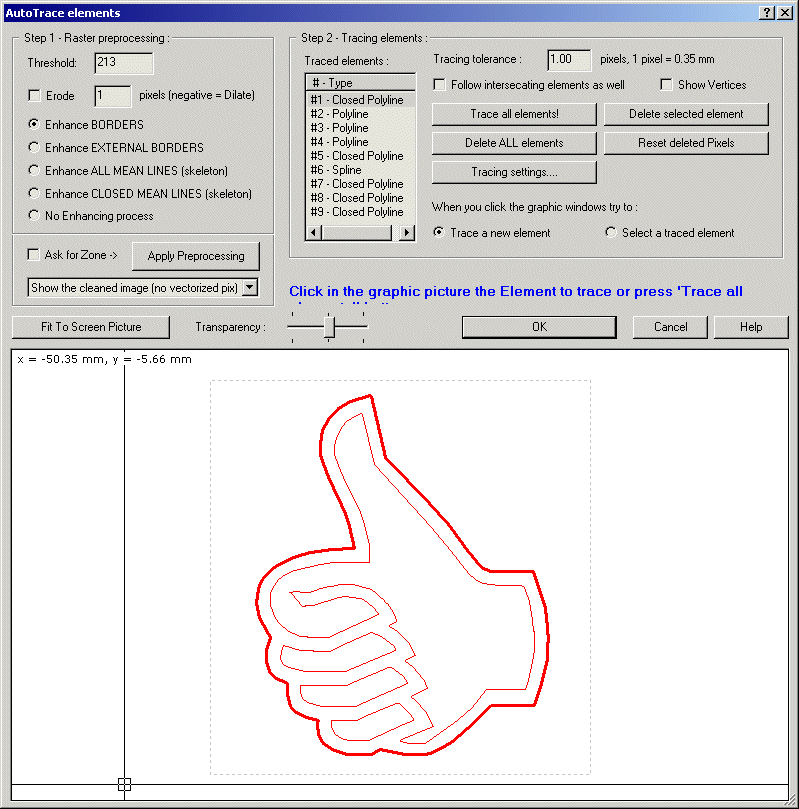
As you can see now the Traced element list is filled, and
you can see the Red traced lines.
Adjusting the zoom and the viewing settings we can also take a deeper look at
the result, see the picture above with:
Now you can simply the 'OK' button and all the Traced elements will be inserted in your Drawing.
Before going on we suggest you to take more confidence with the 2 basic steps:
Pro version only
