|
||||
|
What is the Cutting path? How can I create and modify it?
|
||||
What is the Cutting path? How can I create and modify it?
The Cutting Path is the Path generated on the left and right
carriages to drive the hot wire and cut the Foam.
For 2D cuts the left and right Path are identical, see
What's devFoam?
The concept is similar to a 3 axis CNC milling machine,
where a milling tool can cut parts, following the cutting path.
What makes the process difficoult in Foam cutting is the impossibility to break
the cutting path and start it again. 3 axys milling machines simply raise the
tool over the material to do that, but that is not possible here.
So the idea here is to build a single continuos cutting path.
Let's make an example: we want to cut 'A' and 'B' letters. See the picture
below:
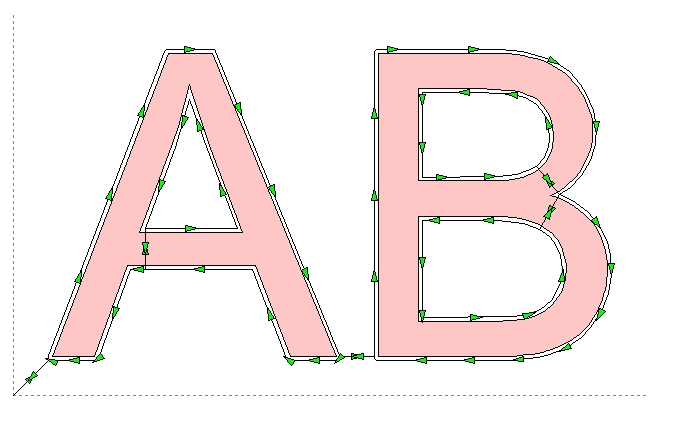
The pink shapes are the geometries of the 2 letters, and the black line is the cutting path created by devFoam. In the bottom left side you can see the Home (the starting/ending point of the travel of the hot wire). Following the arrows you can see how the external and internal contours of the letters are cut connecting the letters and making a (as little as possible) cut crossing the letters themselves.
To create a Cutting Path You can select between:
Clicking the Create cut Path button
the Path will be created and displayed to the picture, see the example below:
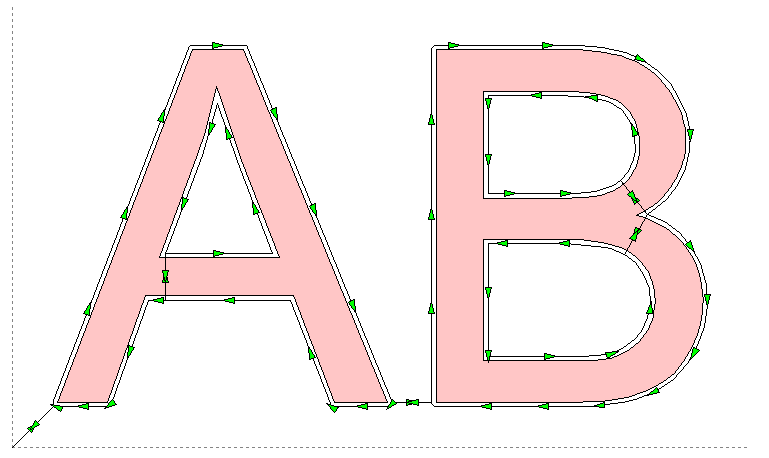
You can see now a black polyline (the Cutting path) with
some arrows showing the cut direction.
You can move the entry/exit points and the Home position enabling the Edit
mode checkbox.
See the picture showing what happens enabling it:
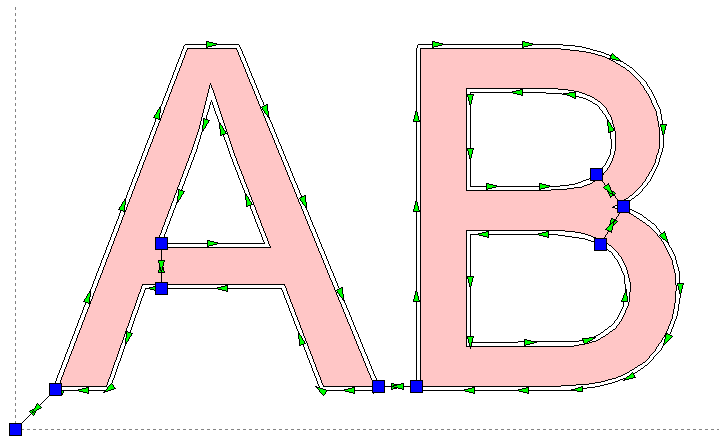
Now you can see some Blue control points. You can drag and
drop them to move the entry/exit points and the Home position.
When you drag a Blue control point on the Cutting path also some little green
squares are added: they shows the Vertices of the Cutting Path, so you can move
the point to an existing vertex. The green square also works as snap points, so
if you stay near them with the mouse, they will capture the mouse pointer. If
you want cancel the current moving action press the 'Esc' button.
If you drop the control point to an invalid part of the cutting path you are
alerted by a message and the operation is aborted.
You can use Undo/Redo buttons to Undo/Redo this operations.
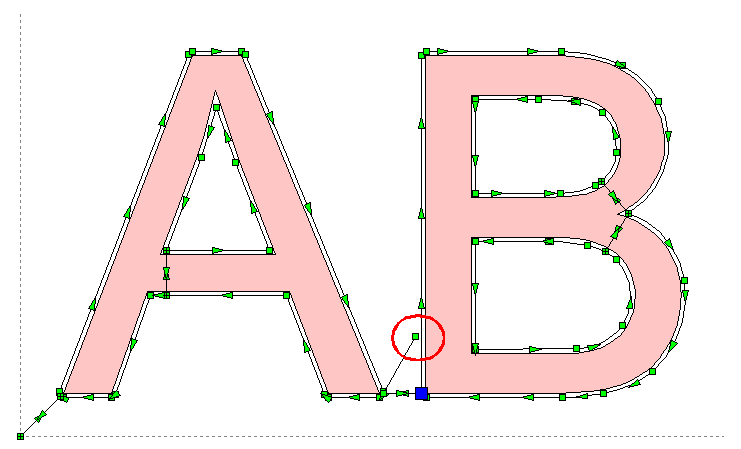
See below what happen when you drag a control point: you can see in the red
circle (added only here to better explain) the point you are moving and a line
connecting the other point of the original connecting line.
Once the Cutting path is right for you, you can export
it in the format you prefer using the buttons included in the upper/right side
of the dialog.
You can them import/open this file in the application you use to drive your
CNC, see also How can I send the work done in devFoam to my Foam
Cutting CNC machine?
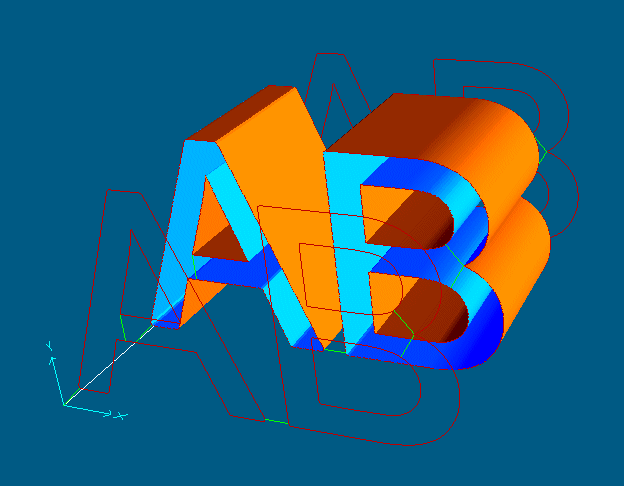
In the picture below you can see the
3D preview of the cutting job
The red lines show the real cutting path of each carriage, the green lines the
connecting lines, and in orange/cyan the cut parts
See also:Cutting by irradiation or by contact
I suggest also to take a look at this page, to better understand some important concepts of devFoam: DevFoam FAQ and important concepts