|
||||
|
Advanced Cutting Wizard: nesting of the Parts in the Foam
Block(s)
|
||||
|
||||
|
Advanced Cutting Wizard: nesting of the Parts in the Foam
Block(s)
|
||||
Advanced Cutting Wizard: nesting of the Parts in the Foam Block(s)
This wizard includes 3 pages:
The following dialog will appear:
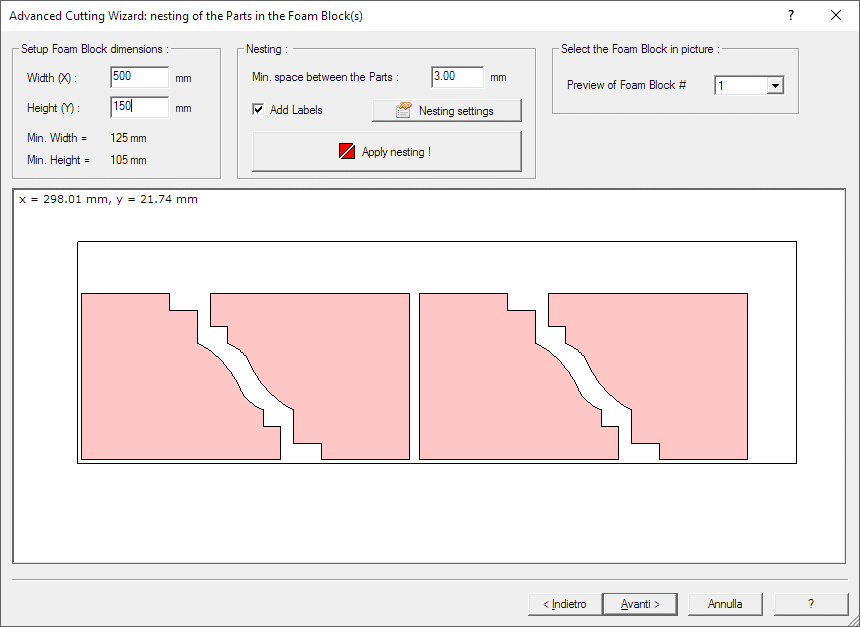
In this page you will apply the Nesting operation, to place the Parts you selected in one ore more Foam blocks.
The first thing to do is to set the Foam block dimension,
see the 'Setup Foam block dimensions' frame.
You can read there also the minimal dimension required, calculated using the
selected parts dimensions and adding the Min. space between the Parts.
The Min. space between the Parts must be larger than the
Kerf, or your
Cutting path can intersecate the Parts.
You can select if you want to apply the labels, using the Name of the parts
defined in the previous page. This can be useful if you have many Parts, to
locate them after the
Nesting operation
Now you can press the 'Apply nesting !' button.
The parts will be placed on one or more foam blocks, you can then see each of them using Combobox included in the 'Select the Foam Block in picture' Frame
You can also customize the nesting using the 'Nesting setting' button. The Nesting settings dialog will appear
I suggest also to take a look at this page, to better understand some important concepts of devFoam: DevFoam FAQ and important concepts
