|
||||
|
Stl part - Customize Twisted Rotations
|
||||
|
||||
|
Stl part - Customize Twisted Rotations
|
||||
Stl part - Customize Twisted Rotations
You can get this dialog box pressing the 'Customize Twisted Rotations' button located in the 'Cut Stl Part' page.
Using this feature You can then create in
automatic way a number of NOT equispaced and not costant rotations, to
cut the part in a faster and better way. Using this feature for each cut the
rotation angle will change to perform the best possible cut!
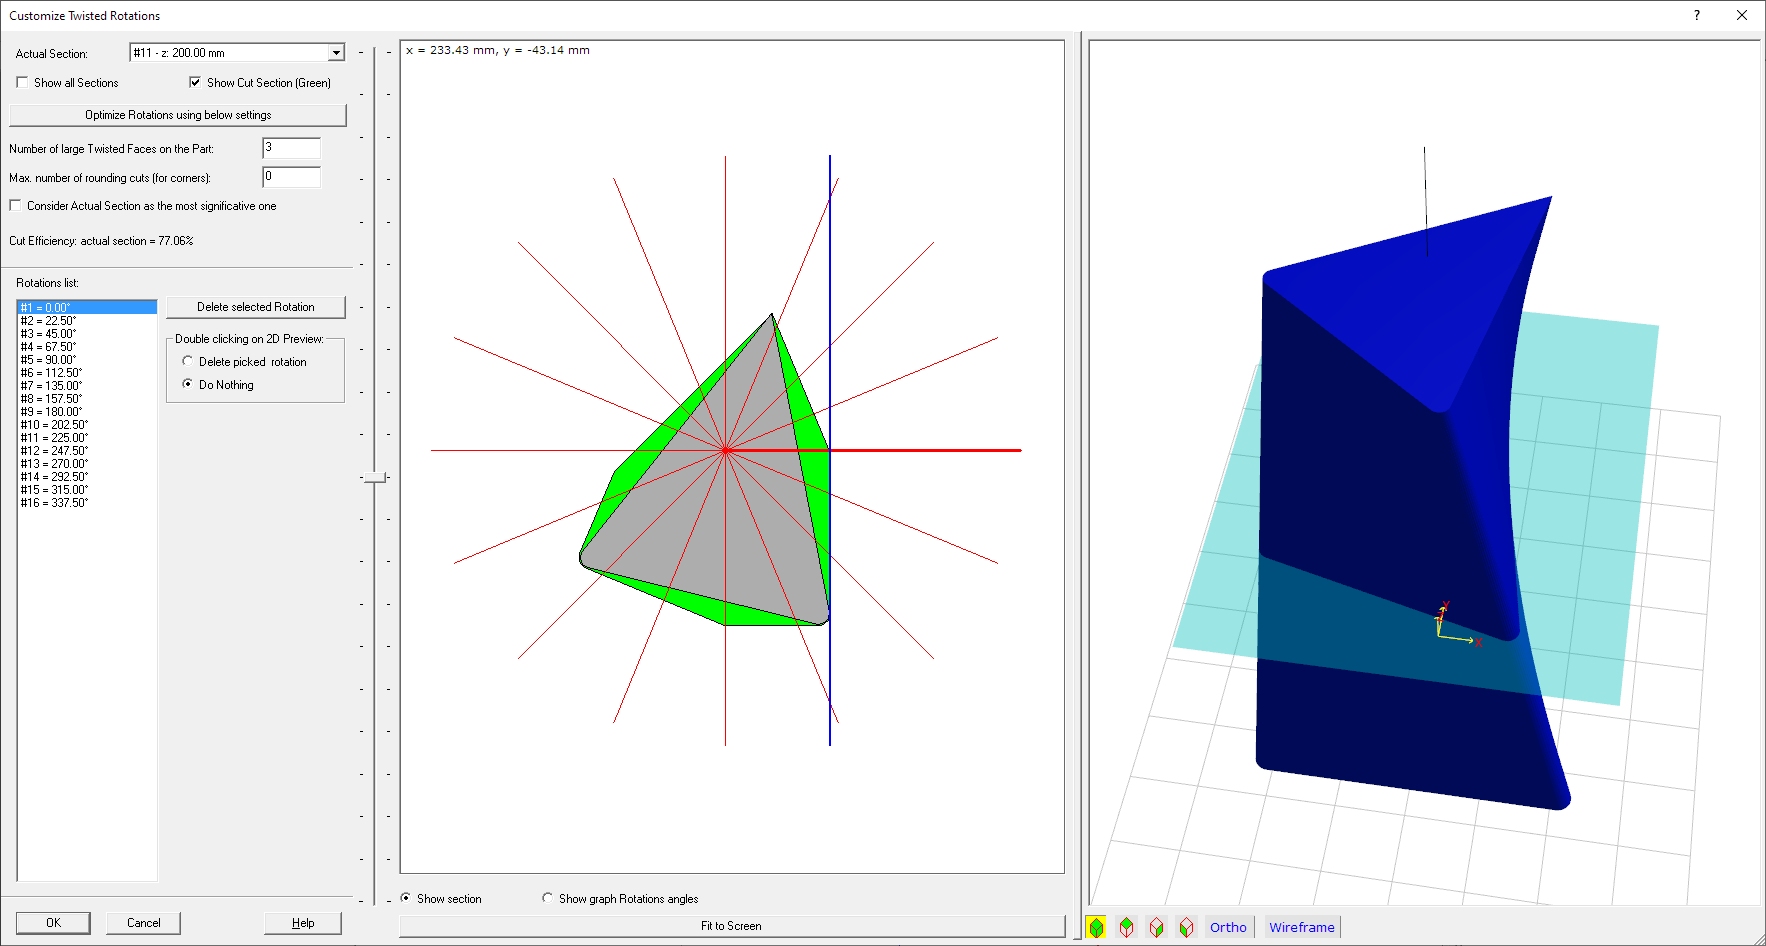
For example You can can see here below the Blue part cut by 16 standard
equspaced rotations.
The central 2D picture shows a selected section along the Part Z height.
The Gray Region shows the section of the STL part, the Green
Regions show the material that cannot be cut using these
rotations.
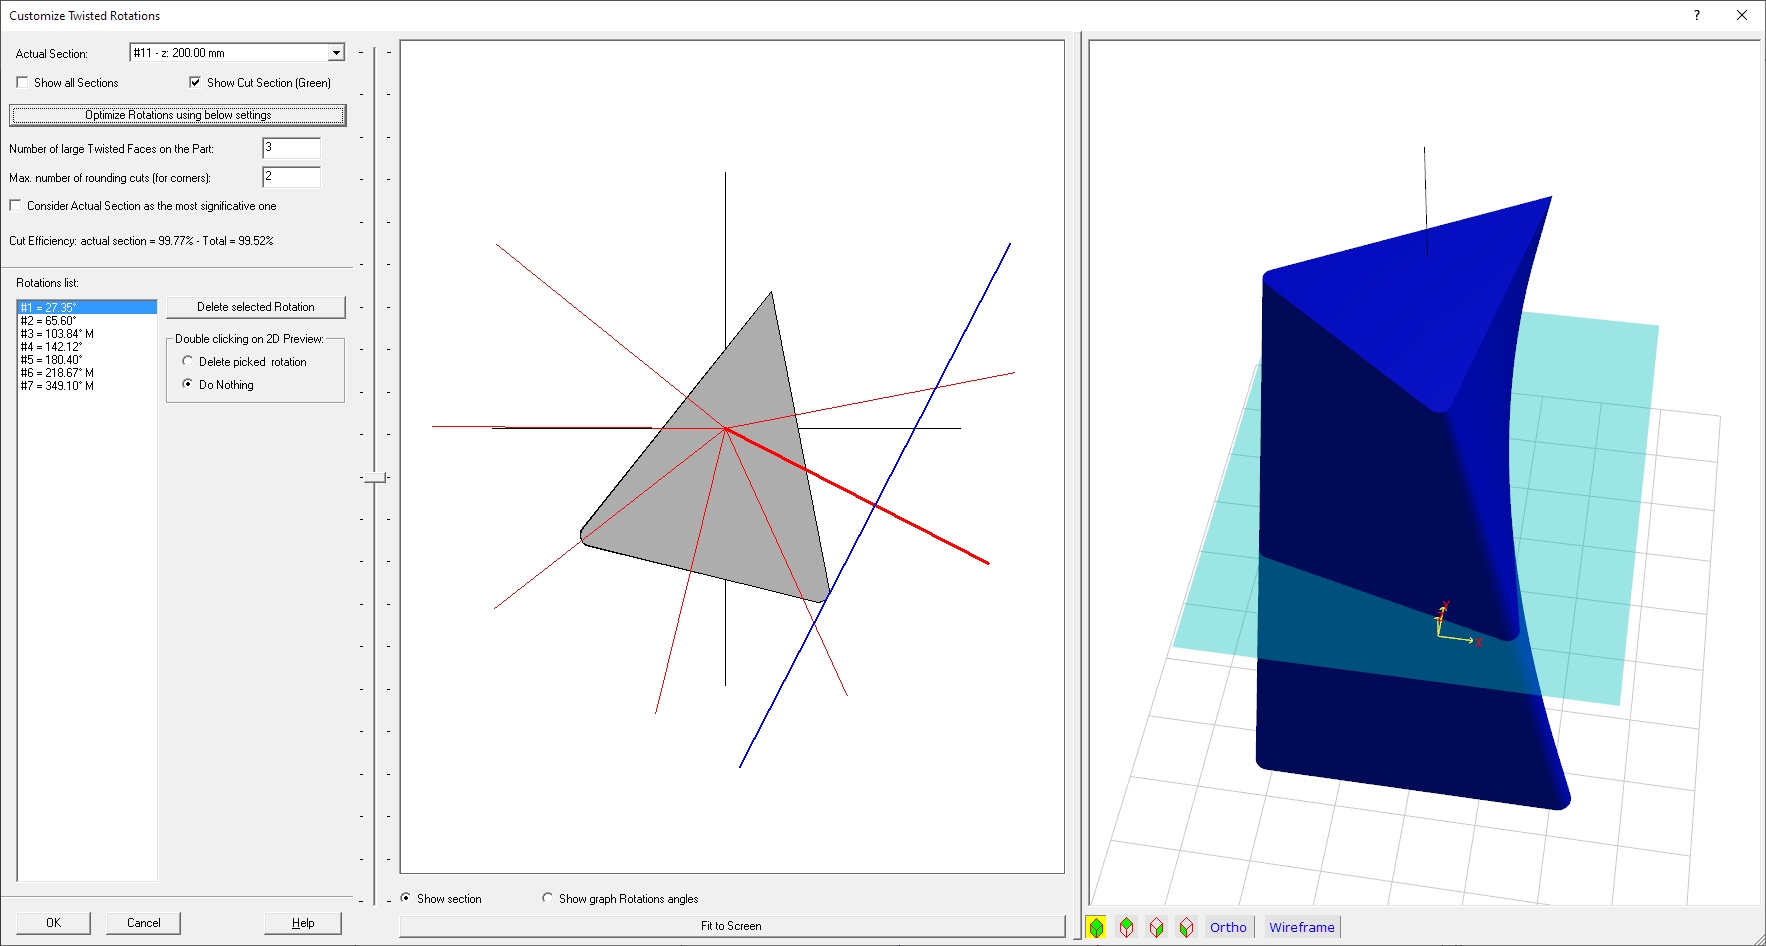
In the below image you can see the result after we pressed
the 'Optimize Rotations using below settings' button.
We asked for 3 rotations on Large faces and 2 rotations for rounding cuts.
The result is just 7 rotations and almost zero Green regions.
In this way the cut will require less than Half the time, and the result won't
require further sanding!
Now we will explain in deep every single part of the dialog.
Left side: the parameters and commands
Actual section: You can select here (or
moving the Vertical cursor placed just before the 2D preview) the actual XY
section.
Show all sections: Enabling this option also the other section
will be rendered as light gray in the 2D Picture.
Show Cut section (Green): Enabling this option the part
of uncut material (after the cut is applied) will be rendered as Green. The
better the rotations settings, the lower the Green Area.
Optimize Rotations using below settings: Pressing this button the application will automatically generate a set of Optimized rotation. You can specify:
Consider Actual Section as the most significative one: you can also specify which section is for you the most significative one by selecting it and applying this option. If not the application will preprocess the full Stl part to find what it assume to be the most significative one.
Manual rotation management:
The only option here is to delete some undesired rotation. Applying manually the rotations if far too complex to be viable, as you should speficy the right angle for each section of each rotation.
To Delete a rotation you can use the 'Delete
selected Rotation' button, or enabe the 'Delete picked rotation'
action and double click on the rotation you want to delete
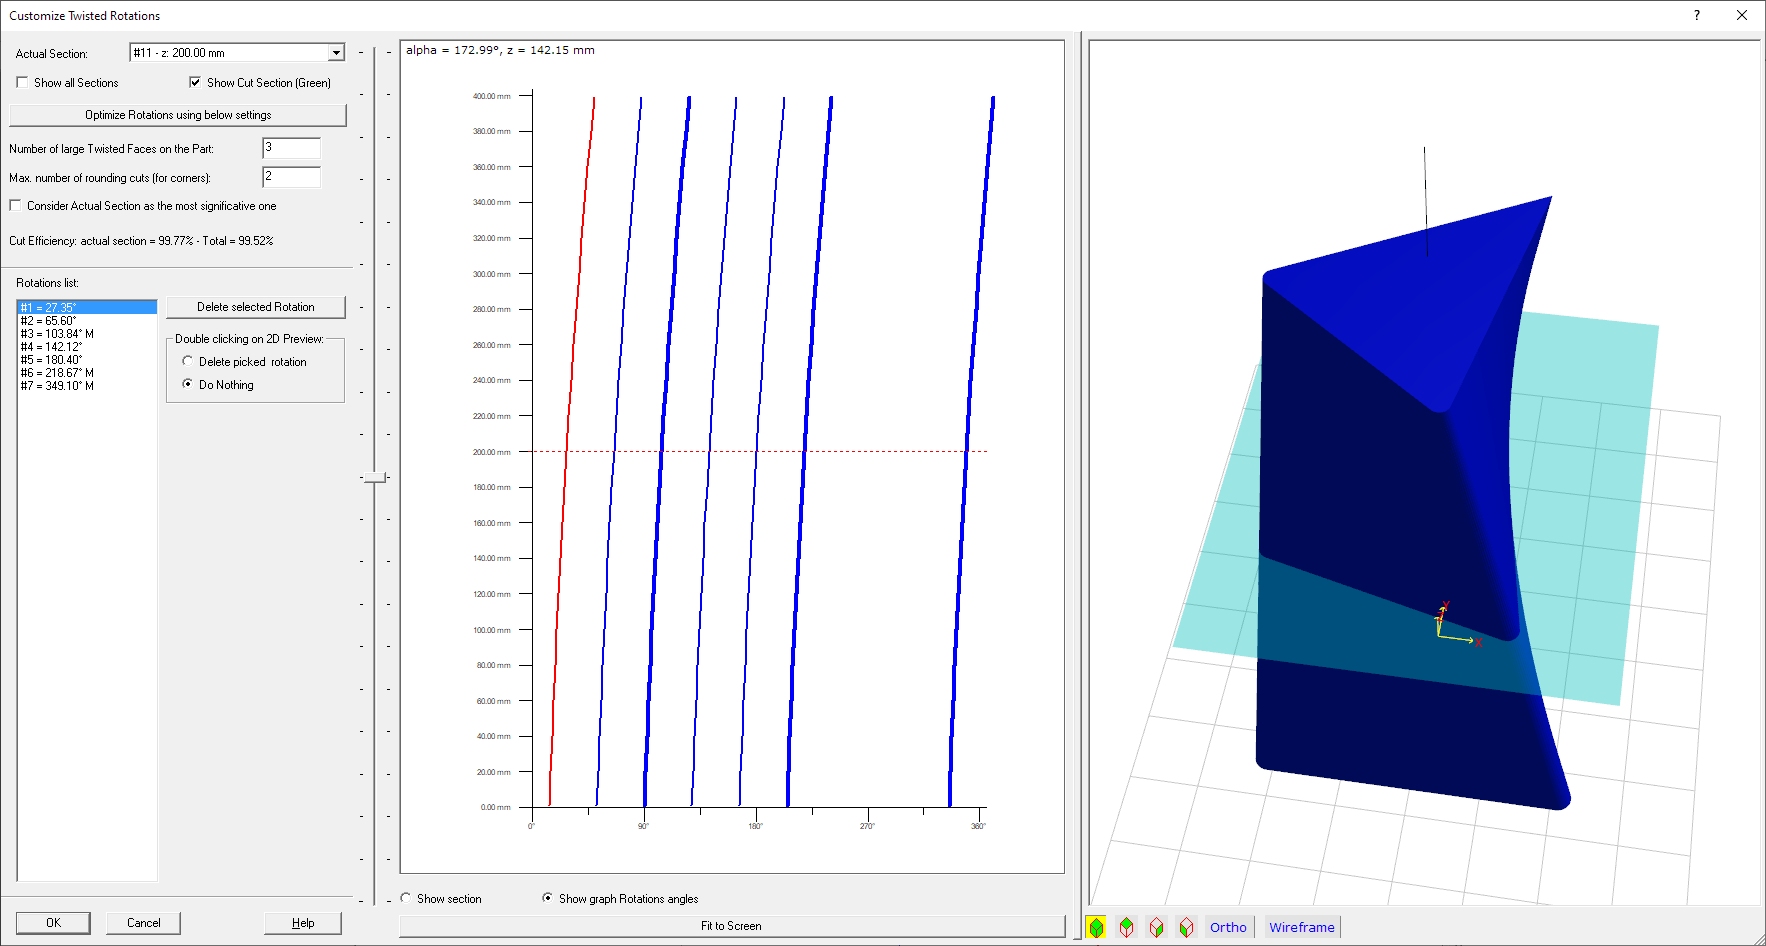
Middle side: the 2D preview
The 2D Preview can show two types of View:
You can see here below the way a GOOD graph Rotations angles
can be:
Pressing the 'Fit to screen' button you will maximize the drawing to the 2D preview window size.
Right side: the 3D preview
You can see here the 3D Preview of the Stl part.
You can also see a transparent Cyan rectangle indicating the actual XY section.
The optional grid can be customized by the '3D Preview' menu.
You can make measurements on the 3D preview selecting the Orthogonal view and
some predefined Top-Side-Front view.
Pressing OK you will go back to the 'Cut
Stl Part' page, with the new rotations setting.
Pressing Cancel you will go back to the 'Cut
Stl Part' page, with the old rotations setting.
