|
||||
|
Tapered Parts Cutting wizard: Cutting Path creation
|
||||
|
||||
|
Tapered Parts Cutting wizard: Cutting Path creation
|
||||
Tapered Parts Cutting wizard: Cutting Path creation Pro version only
This wizard includes 5 pages:
The following dialog will appear:
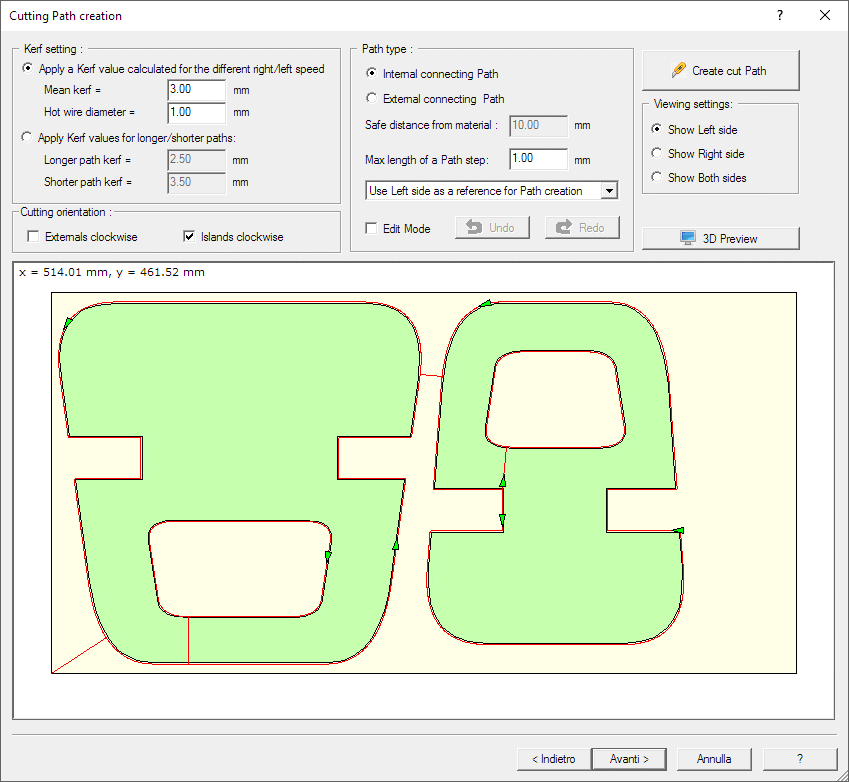
Let's take a view at each panel of this page:
Kerf setting
The kerf is the thickness of the foam melted by the hot wire.
You can select between 2 strategies to apply the kerf:
Cutting orientation
You can select the cutting orientation both of external and internal contours.
Path type
You can select here the Cutting Path type:
Other settings:
Viewing settings
You can selected here which sides you want to display in the graphic view
Other buttons
More info about Edit Mode
You can move the entry/exit points enabling the Edit mode checkbox.
See the picture showing what happens enabling it:
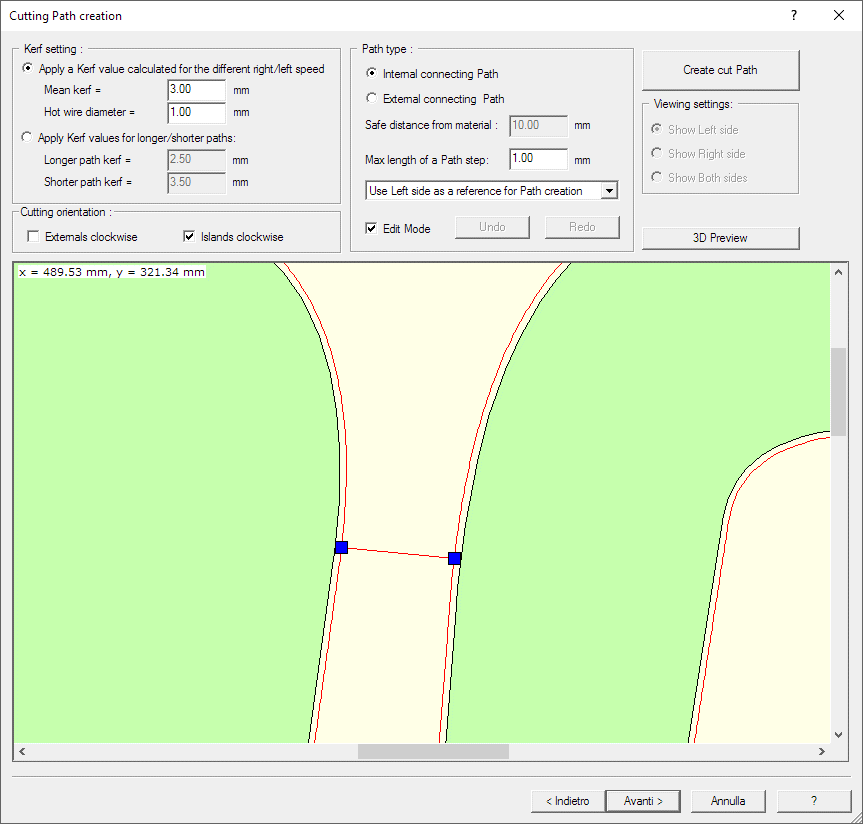
Now you can see some Blue control points. You can drag and
drop them to move the entry/exit points and the Home position. Click the Blue
point to start dragging.
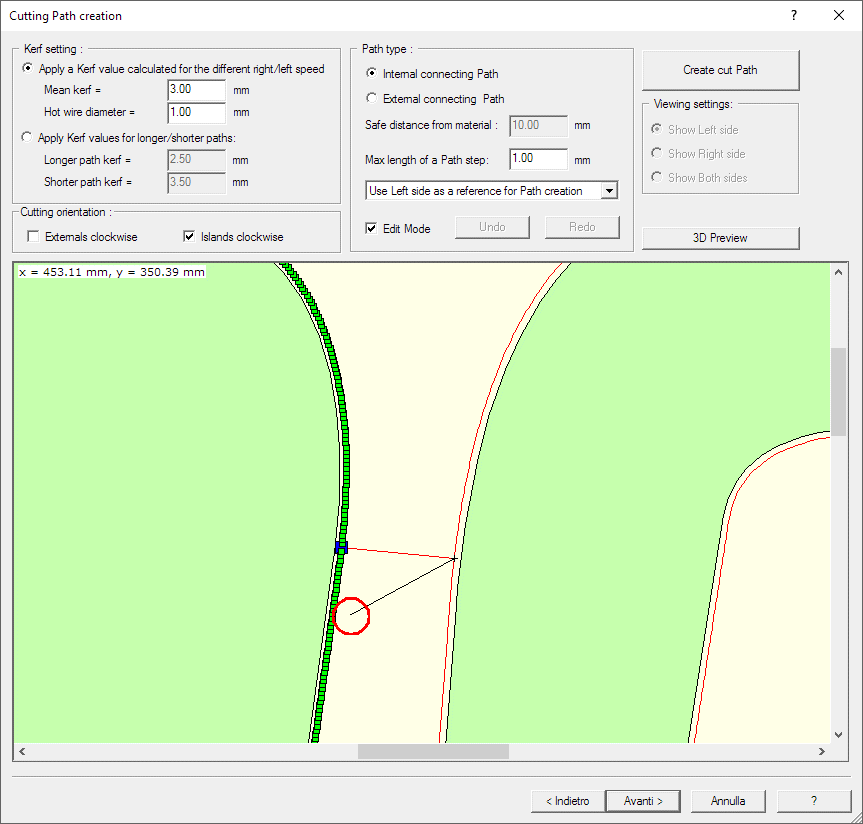
When you drag a Blue control point on the Cutting path also some little green
squares are added: they shows the Vertices of the Cutting Path, so you can move
the point to an existing vertex. The green square also works as snap points, so
if you stay near them with the mouse, they will capture the mouse pointer. If
you want cancel the current moving press the 'Esc' button.
If you drop the control point to an invalid part of the cutting path you are
alerted by a message and the operation is aborted.
You can use Undo/Redo buttons to Undo/Redo this operations.
See below what happen when you drag a control point: you can see in the red
circle (added only here to better explain) the point you are moving and a line
connecting the other point of the original connecting line. Click the
mouse near the new point where you want to move the connection point.
When you finished to set the right values press the Next button to go to Optional: Create a Grid cut of multiple instances of selected parts
page
More info about the picture in this dialog:
